Introduction
Windows Azure platform is Microsoft’s cloud solution. Compare to other cloud solutions, the biggest advantage is it seamlessly integrate with Microsoft .NET framework and development environment, therefore, regular .NET application can be moved to Azure effortless. This article will show how to develop and deploy an ASP.NET MVC web application to Windows Azure platform.
Develop a MVC application with Azure SDK
In order to develop an application that can run on Windows Azure, you must have Windows Azure SDK installed on your computer. The Azure SDK can be downloaded from Microsoft Windows Azure portal site.
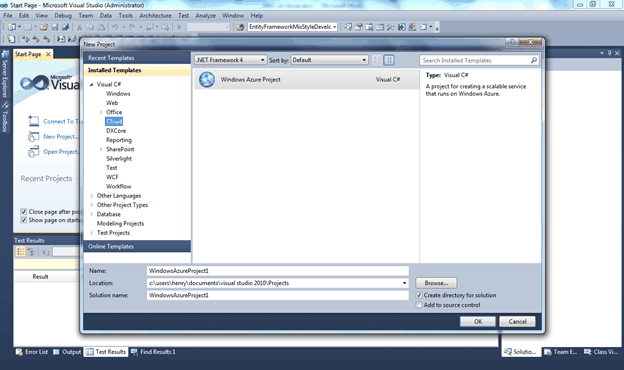
After installed Windows Azure SDK, you can open up Visual Studio to start a new project. There is a new project category Cloud in your Visual Studio project template. It has only one project template, Windows Azure Project.
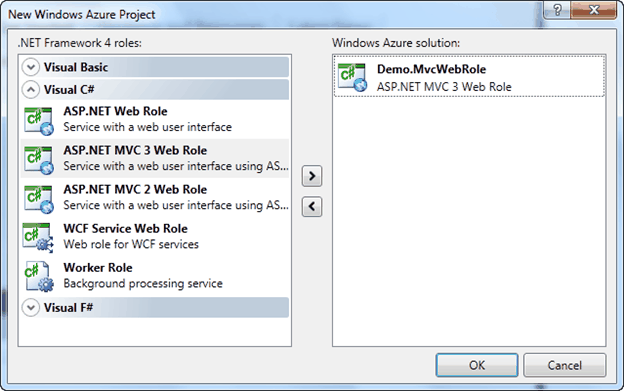
After selected Windows Azure Project, you can choose different Roles. Role represents the application running in Windows Azure platform. There are three types of role defined in Windows Azure platform, web role, windows role and VM role. Web role stands for a web application, windows role stands for a windows service application, and VM role stands for a standalone Windows environment. In Visual Studio, you can create ASP.NET Web Role, ASP.NET MVC 3 Web Role, ASP.NET MVC 2 Web Role, and WCF Service Web Role. Not any application is suitable for running in Windows Azure.
If selected ASP.NET MVC 3 Web Role project, you can follow the project wizard to create the web application. This project wizard is identical to the normal ASP.NET MVC 3 project wizard. Below is what your solution end up with
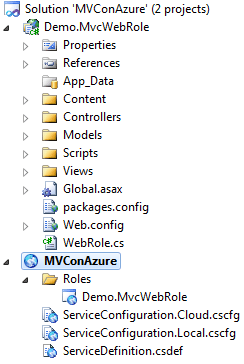
If you compare this solution with a normal ASP.NET MVC solution, you will see an additional Azure project is in here. It contains configurations of our Windows Azure project. There are two kinds of configuration file: Service definition file, ServiceDefinition.csdef, and service configuration file, ServiceConfiguration.cscfg.
The service definition file defines all roles in your solution and their information that includes
1. Endpoint information. E.g. HTTP is used for web role.
2. Storage information. E.g. local storage or Azure storage.
3. Any custom configuration information.
This is what ServiceDefinition.csdef file looks like in my Azure project
1. Endpoint information. E.g. HTTP is used for web role.
2. Storage information. E.g. local storage or Azure storage.
3. Any custom configuration information.
This is what ServiceDefinition.csdef file looks like in my Azure project
<?xml version="1.0" encoding="utf-8"?><ServiceDefinition name="MVConAzure" xmlns="http://schemas.microsoft.com/ServiceHosting/2008/10/ServiceDefinition"> <WebRole name="Demo.MvcWebRole" vmsize="Small"> <Sites> <Site name="Web"> <Bindings> <Binding name="Endpoint1" endpointName="Endpoint1" /> </Bindings> </Site> </Sites> <Endpoints> <InputEndpoint name="Endpoint1" protocol="http" port="80" /> </Endpoints> <Imports> <Import moduleName="Diagnostics" /> </Imports> </WebRole></ServiceDefinition>
The service definition cannot be changed at runtime. Any change requires a new deployment of your service. Your service is restricted in using only the network endpoints and resources that are defined in this file. You can think of this piece of the configuration as defining what the infrastructure of your service is, and how the parts fit together.
The service configuration file includes the entire configuration needed for the role instances in your service. Each role has its own configuration. The contents of the configuration file can be changed at runtime, which saves the need to redeploy your application when some part of the role configuration changes. You can also access the configuration in code, in a similar manner that you might read a web.config file in an ASP.NET application.
This is what ServiceConfiguration looks like in my Azure project
<?xml version="1.0" encoding="utf-8"?><ServiceConfiguration serviceName="MVConAzure" xmlns="http://schemas.microsoft.com/ServiceHosting/2008/10/ServiceConfiguration" osFamily="1" osVersion="*"> <Role name="Demo.MvcWebRole"> <Instances count="1" /> <ConfigurationSettings> <Setting name="Microsoft.WindowsAzure.Plugins.Diagnostics.ConnectionString" value="UseDevelopmentStorage=true" /> </ConfigurationSettings> </Role></ServiceConfiguration>
You can compile and run the application right now. The application is not running in Visual Studio Cassini local web server as the normal ASP.NET MVC application. It’s running in Windows Azure Emulator. Windows Azure platform includes three major pieces, Windows Azure, SQL Azure, and Windows Azure AppFabric. The emulator is acting very similar to Windows Azure platform. It allow developer to run and debug application without deploy to the public cloud.
Note: sometime you will see error
Windows Azure Tools: Failed to initialize Windows Azure storage emulator. Unable to start Development Storage. Failed to start Storage Emulator: the SQL Server instance ‘localhost\SQLExpress’ could not be found. Please configure the SQL Server instance for Storage Emulator using the ‘DSInit’ utility in the Windows Azure SDK.
This is because Windows Azure storage emulator default uses SQLExpress as the backend database. If you don’t have SQLExpress database installed or it is not installed with the default name, then Storage Eumlator will not able to find it. To fix this error, you can use DSInit to change storage emulator to point to your local SQLServer database.
Deploy Application to Windows Azure Public Cloud
To deploy the application to Windows Azure platform, you need to have Windows Azure account first. You can register a Windows Azure account for 90 days free trial. However, you need to provide your credit card information, so Microsoft can charge you to your credit card for any over the limit usage. The deployment is very simple. You can publish your Windows Azure based application directly to Windows Azure public cloud in Visual Studio.
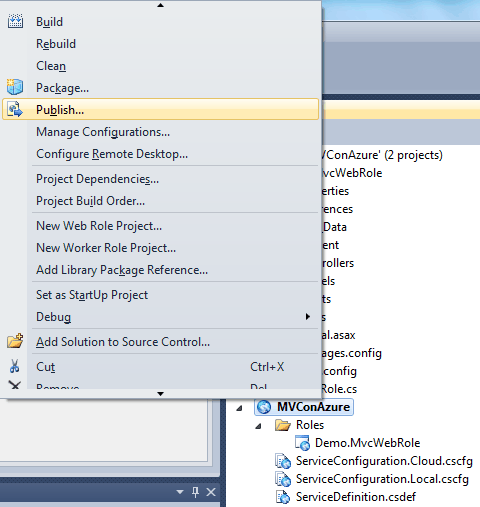
Right click the Azure project and select Publish menu item. This will bring up Publish Windows Azure Application window.
1. Select your subscription.
2. Select your setting. Give a host service name. This name will be used as your subdomain name.
Note: if this is the first time publishing application to Windows Azure Platform, you will be prompted to add a Windows Azure authentication setting.
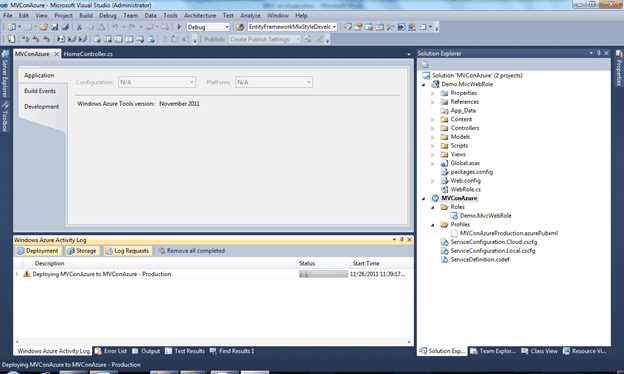
3. Click Pushing button to start the publish process. The Visual Studio will compile your application first, and then connect to Windows Azure platform with your account information to start deployment. There is new tab, Windows Azure Active Log, shows up in your Visual Studio IDE to display the progress of deployment. The entire deployment could take several minutes.
1. Select your subscription.
2. Select your setting. Give a host service name. This name will be used as your subdomain name.
Note: if this is the first time publishing application to Windows Azure Platform, you will be prompted to add a Windows Azure authentication setting.
3. Click Pushing button to start the publish process. The Visual Studio will compile your application first, and then connect to Windows Azure platform with your account information to start deployment. There is new tab, Windows Azure Active Log, shows up in your Visual Studio IDE to display the progress of deployment. The entire deployment could take several minutes.
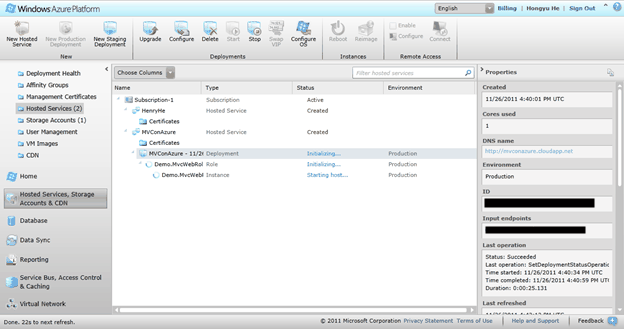
You can also view the deployment status in your Azure control panel
After the deployment completed, the Windows Azure Activity Log window shows status as completed and all deployment information.
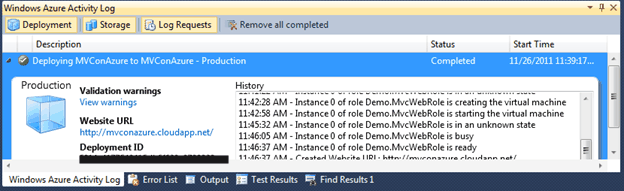
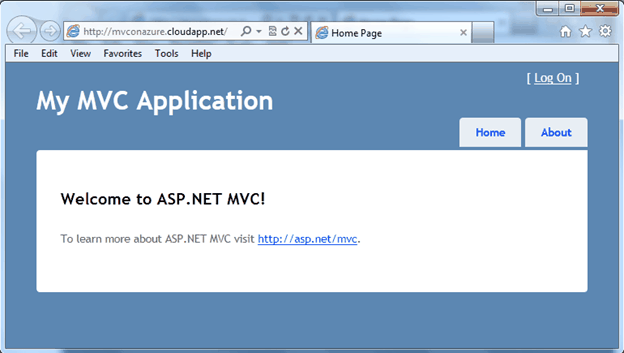
You can use the assigned URL, in here is http://mvconazure.cloudapp.net, to view just deployed MVC web application in Windows Azure public cloud.
Summary
Cloud computing is getting popular right now because the benefits of cost saving, scalability, and easy implementation. The Windows Azure platform is the primary cloud computing choice for .NET application developers because it allows us to leverage all our .NET development knowledge to join the new trend.
No comments:
Post a Comment